Replacing a toilet just sounds overwhelming, but it actually can be a manageable DIY project when you have the right tools and a little know-how. Whether you’re upgrading to a more efficient model or addressing a persistent leak, replacing a toilet can improve your bathroom’s functionality.
Experienced DIYers often finish in about an hour, though first timers may need a couple of hours. It’s straightforward when the flange and subfloor are sound.
The cost to change a toilet runs from $150 to over $500, depending on the toilet you choose and whether the flange needs work.
In this video, This Old House plumbing and heating expert Richard Trethewey demonstrates the step-by-step process of removing an old toilet and installing a new one.
The Cost to Change a Toilet
Changing a toilet is a relatively inexpensive home improvement project. Here is a breakdown of the cost of materials so you can add it to your first home improvement budget.
| Parts and materials | Cost range |
| New 2-piece toilet | $90 – $460 |
| Stainless steel braided supply line | $7 – $17 |
| Wax ring | $3 – $12 |
| Closet bolts | $3 – $9 |
| Plumber’s tape | $1 – $4 |
| Plastic shims | $3 – $7 |
| Silicone caulk | $5 – $12 |
| Total | $112 – $521 |
Tools and materials needed to change a toilet
You’ll need a new toilet obviously. But, not so obviously, you’ll also need a few other things to prevent leaks, wobbling, and those annoying surprise second trips to the store. Make sure to double check the following list of tools and materials so you’re not caught without in the middle of the project.
- New toilet (if replacing the entire unit)
- Something to protect your floor–drop cloth, plywood, old towels
- Gloves
- Large bucket and small container to catch water
- Sponge, wet vac, or plunger to aid in removing water
- New stainless steel braided supply line (if needed)
- Flathead screwdriver
- Open-ended adjustable wrench
- Utility knife
- Rags
- Putty knife
- Small level
- Replacement closet bolts
- New wax ring
- Mini hacksaw
- Plumber’s tape
- Plastic shims
- Silicone caulk and caulk gun
- Tape measure
Safety and prep (don’t skip this)
A little prep keeps this job clean, safe, and a lot less stressful.
- Wear gloves. Old wax and bacteria are not your friends.
- Protect the floor. Lay down a drop cloth, plywood, or old towels, and keep the area dry to avoid slipping.
- Shut off the water, then verify it. Flush once and confirm the tank doesn’t refill.
- Have a bucket ready. You’ll catch the water left in the supply line.
- Lift smart. Toilets are heavy and awkward. Get help if you can.
- Block sewer gas. Once the toilet is out, stuff a rag in the drain opening.
- Set a reminder. Pull the rag out before you install the new toilet.
- Ventilate, if needed. If you use any cleaner or solvent, crack a window.
How to remove an old toilet
To change out a toilet, first shut off the water, drain it, and lift the old unit out. Take your time here. Rushing is how floors get scratched and wax seals get messy.
Step 1: Shut off the water supply.
Locate the shutoff valve near the base of the toilet. It’s usually on the left, coming out of the wall or floor. Turn it clockwise until it stops.
First-time homeowner tip: If the valve is stuck or doesn’t fully shut off, stop and replace it or call a plumber. You’ll thank yourself later.
Step 2: Drain the toilet.
Flush to empty the water from the tank and bowl as much as possible. Then remove the remaining water using one of these methods:
- Soak it up with a sponge and wring it into a bucket.
- Use a wet/dry vacuum.
- Push it through with a plunger.
- Flush it out with more water. Pour from a 5-gallon bucket. Start pouring low with the bucket close to the toilet, then raise the bucket about a foot or so as it drains to trigger a full swirl and flush.
Step 3: Disconnect the water supply line.
Use your hands or an adjustable wrench to loosen the nut connecting the water supply line to the toilet tank. Keep a small container nearby to catch drips.
First-time homeowner tip: If your supply line is old, kinked, or plastic, replace it with a stainless steel braided line. It’s inexpensive insurance against future leaks.
Step 4: Remove the tank (if it’s a two-piece toilet).
If your toilet has a separate tank, remove it first. It makes lifting safer and easier. Unscrew the two tank bolts located inside the tank on either side of the bottom: Hold the top of each bolt in place with a flathead screwdriver, while you use a wrench on the underside of the tank to remove the nut and then take out the bolt. Lift the tank straight up and set it on a towel.
Step 5: Remove the toilet.
Remove the decorative caps covering the bolts at the base of the toilet. Remove the nuts and washers with the wrench. If the toilet was caulked to the floor, use a utility knife to score the caulk between the toilet base and the floor. Rock the toilet gently to break the wax seal. Then lift straight up and off the bolts, being careful not to twist or tilt the toilet so as not to spill any remaining water. Gently set the toilet on a drop cloth or a scrap piece of plywood to protect your floor from any remaining water or wax.
First-time homeowner tip: Grab under the bowl’s rim to get a good grip.
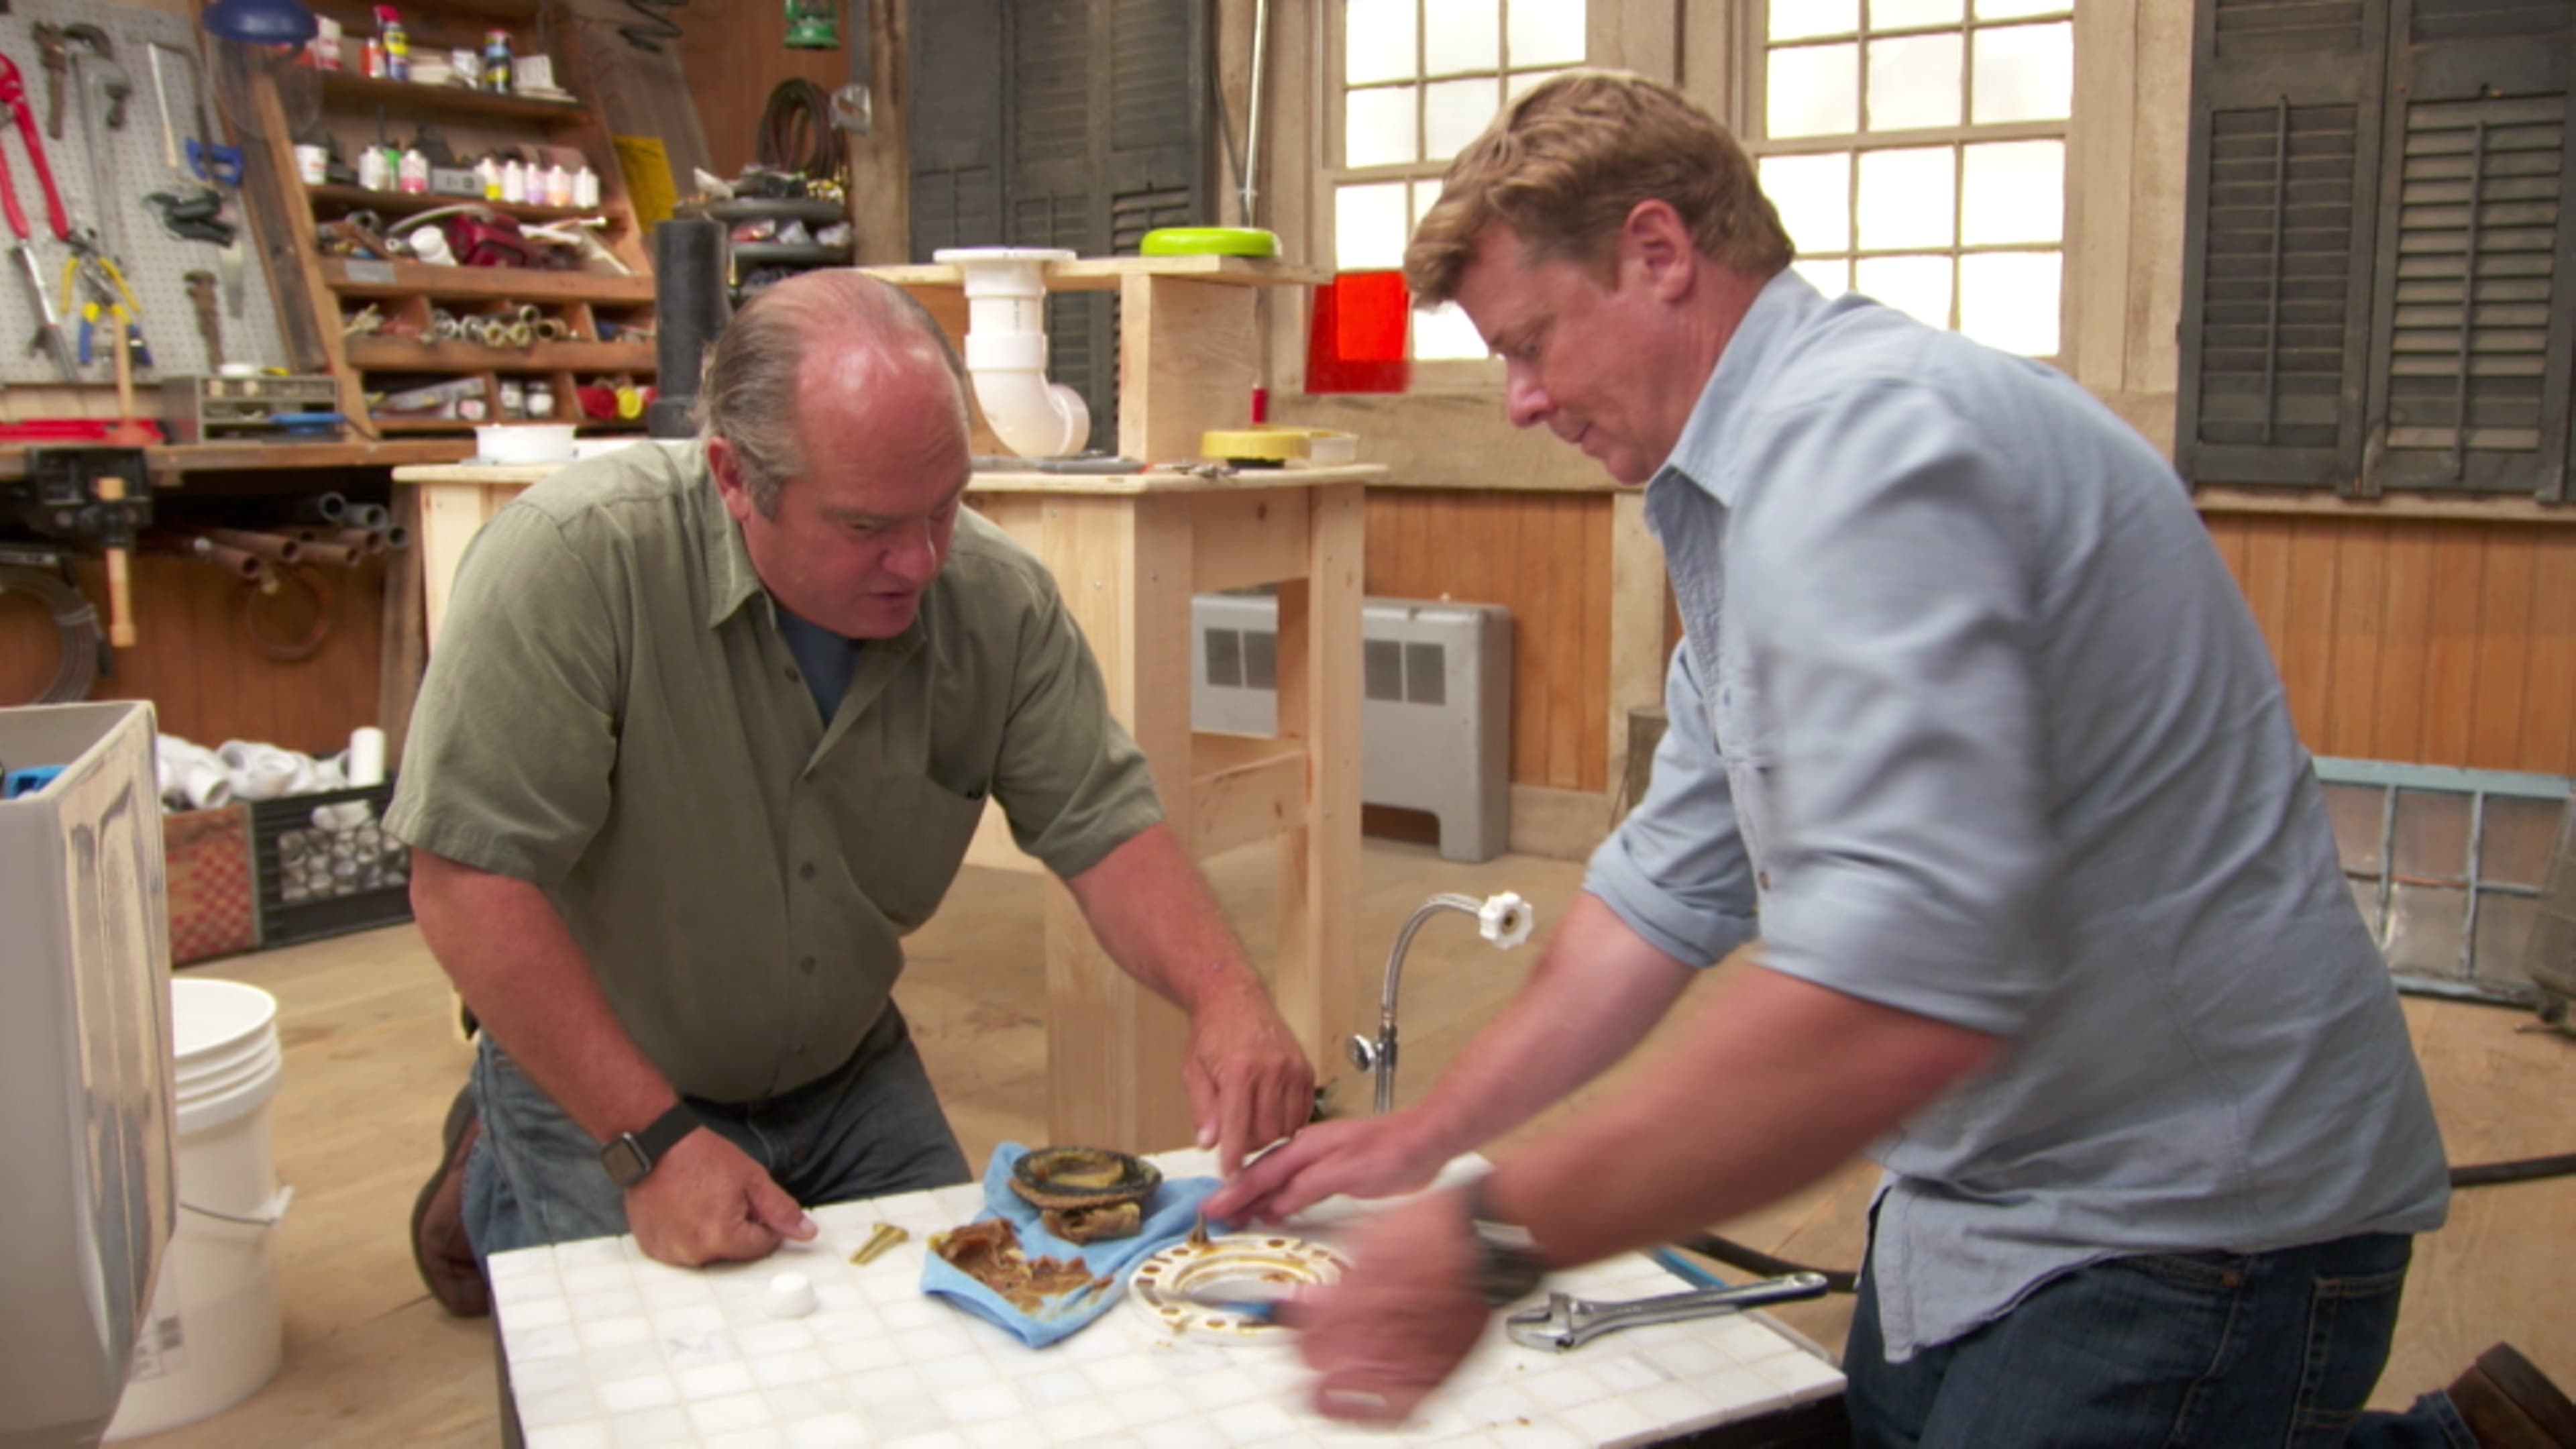
Step 6: Clean the flange area.
With the old toilet removed, the toilet flange is exposed. It’s a round fitting attached to the floor that connects the toilet to the drainpipe. Scrape away any old wax or debris with a putty knife and rag and then discard. Plug the drain opening with a rag to block sewer gas and prevent dropped hardware.
Now do a quick floor check. Press around the flange. If the subfloor feels soft, looks swollen, or shows dark staining, fix that damage before you install the new toilet.
Install the new toilet.
With the old toilet out and the area cleaned up, you’re ready to set the new one.
Step 1: Inspect and prepare the flange.
Take a close look at the toilet flange. It should sit level with, or slightly above, the finished floor. If it sits too low, you may need a flange extender kit or a thicker wax ring to prevent leaks.
If the flange is intact and securely attached to the floor, you can proceed with the installation. If it’s loose, cracked, or damaged, you may need to install a new toilet flange before continuing.
First-time homeowner tip: Set a level where the toilet base will sit. If the floor is uneven, plan to use plastic shims later so the toilet won’t rock and break the seal.
Step 2: Set the new closet bolts.
Slide new closet bolts into the flange slots. (closet bolts get their name from the term water closet, a historical term for bathroom.) Trethewey prefers bolts with plastic retainers because they stay upright and are easier to line up.
Step 3: How to change a toilet seal (wax ring).
First, remove the rag from the drain. Place a new wax ring on the flange and make sure it’s centered. As Trethewey demonstrates in the video, some wax rings come with a plastic horn that helps direct water flow and provides a more secure seal.
To fix a low toilet flange, use an extra-thick wax ring or a flange extender kit.
Step 4: Position the new toilet.
Carefully lift the bowl and align it with the bolts. Lower it straight down onto the wax ring, using the bolts as guides. A helper makes this step much easier. Once it’s down, press evenly with your body weight to compress the wax. Don’t rock or twist the bowl, as this can break the seal.
First-time homeowner tip: Once the toilet touches the wax, you don’t get a second try. If you have to lift it again, use a new wax ring.
Step 5: Secure the toilet.
Place the washers and nuts onto the closet bolts. Hand-tighten the nuts, alternating sides, until the washers just begin to compress. Stop when it feels snug. Over-tightening can crack the base. Trim the bolt ends with a mini hacksaw, then snap on the decorative caps.
Step 6: Install the tank (if it’s a two-piece toilet).
Set the tank-to-bowl gasket in place, then lower the tank onto the bowl. Add a bolt in one of the holes inside the tank, then place the washer and nut on the bolt on the underside of the tank. Repeat on the other side. Tighten the bolts evenly, alternating sides.
Go slow. Stop when the tank feels stable and level. Over-tightening can crack the porcelain.
Reconnect the water supply.
With the toilet secured, it’s time to hook the water back up and check your work.
- Wrap plumber’s tape on the fill valve’s threaded connection. Go clockwise, 3–4 turns.
- Connect the water supply line to the fill valve, tightening it by hand.
- Use an adjustable wrench to give it a final quarter turn, being careful not to overtighten.
- Turn the water supply on slowly. Let the tank fill all the way.
Check leaks like a pro by placing dry paper towels under the supply connection, around the tank-to-bowl area, and at the base. Tiny drips show up fast.
Flush the toilet several times to ensure proper function and to check for delayed leaks.
First-time homeowner tip: Check again after a few hours, then again the next day. Slow leaks can hide until they’ve done real damage.
Toilet finishing touches
Once you’ve confirmed there are no leaks, wrap up with a few quick finishing steps.
Install the toilet seat.
If you’re installing a new toilet seat, follow the manufacturer’s instructions for attachment. Most seats come with plastic bolts and wing nuts for easy installation. Secure the seat carefully to ensure it fits snugly and comfortably.
Level it, then caulk the base.
Before you caulk anything, make sure the toilet doesn’t rock. Slide plastic shims under low spots until the bowl sits solid and level. Then, trim the shims flush with the base using a utility knife.
Some plumbers leave the base uncaulked so leaks are easier to spot. Others run a thin bead of silicone caulk for a cleaner look and to keep water from seeping under the toilet. If you caulk, apply an even bead and smooth it as you go.
Check the flush.
Flush the toilet several times to check for leaks and ensure everything functions as it should. If the flush feels weak, check the tank water level. If needed, adjust the float following the manufacturer’s instructions.
Common installation issues
Most toilet installs go smoothly. But just in case, here’s how to troubleshoot common issues:
- The toilet rocks: Level it with plastic shims before you caulk.
- Weak flush: Check the tank parts. Make sure the fill valve is set correctly and the flapper opens fully and closes cleanly.
- Leak at the base: The wax ring likely didn’t seal. You’ll need to pull the toilet and install a new wax ring. Or stack two for a better seal.
- Leak at the supply line: Add plumber’s tape and tighten the connection in small increments.
- Leak between the tank and bowl: Tighten the tank bolts evenly, alternating sides, or replace the tank-to-bowl gasket.
- Toilet keeps running: Adjust the fill valve, check the flapper for a good seal, and make sure the chain has a little slack.
When to call a pro
Whether you’re a DIY newbie or a seasoned homeowner, problems can arise that you shouldn’t handle. Bring in a licensed plumber if you run into any of the following:
- The toilet flange is severely damaged or won’t hold bolts securely.
- You find soft, water-stained, or rotted subfloor.
- The shutoff valve won’t close.
- You’re installing an integrated bidet toilet with electrical requirements.
Replacing a toilet is one of those projects that builds real homeowner confidence. Take your time, check on it for the next couple of days, and call it done.